Connect Facebook Messenger
Ready to automate your Facebook Messenger responses with AI?
Connecting your Facebook Page to DealDroid allows your AI Agent to handle all Messenger conversations automatically. Unlike LINE, the Facebook integration is straightforward — you can connect directly through DealDroid using Facebook’s OAuth login. No need to copy API keys or configure webhooks manually!
Let’s get your Facebook Messenger connected in just a few clicks. 🚀
Why Connect Facebook Messenger?
Section titled “Why Connect Facebook Messenger?”- 💬 Instant responses — Your AI Agent replies to every Messenger conversation immediately
- ⚡ No manual work — AI handles inquiries, product questions, and sales 24/7
- 🎯 Higher conversion — Fast responses mean more engaged customers and more sales
- 📊 All in one dashboard — Manage Facebook conversations alongside LINE, WhatsApp, and other channels in DealDroid
Facebook Messenger is one of the most popular messaging platforms worldwide. By connecting it to DealDroid, you ensure no customer message goes unanswered — even when your team is offline.
Before You Begin
Section titled “Before You Begin”Make sure you have:
- ✅ A Facebook Page (not a personal profile) — Your AI will respond to messages sent to your Page
- ✅ Admin access to the Facebook Page you want to connect
- ✅ A DealDroid account with at least one Droid (AI Agent) already created
Step 1: Navigate to Channels and Create Facebook Page
Section titled “Step 1: Navigate to Channels and Create Facebook Page”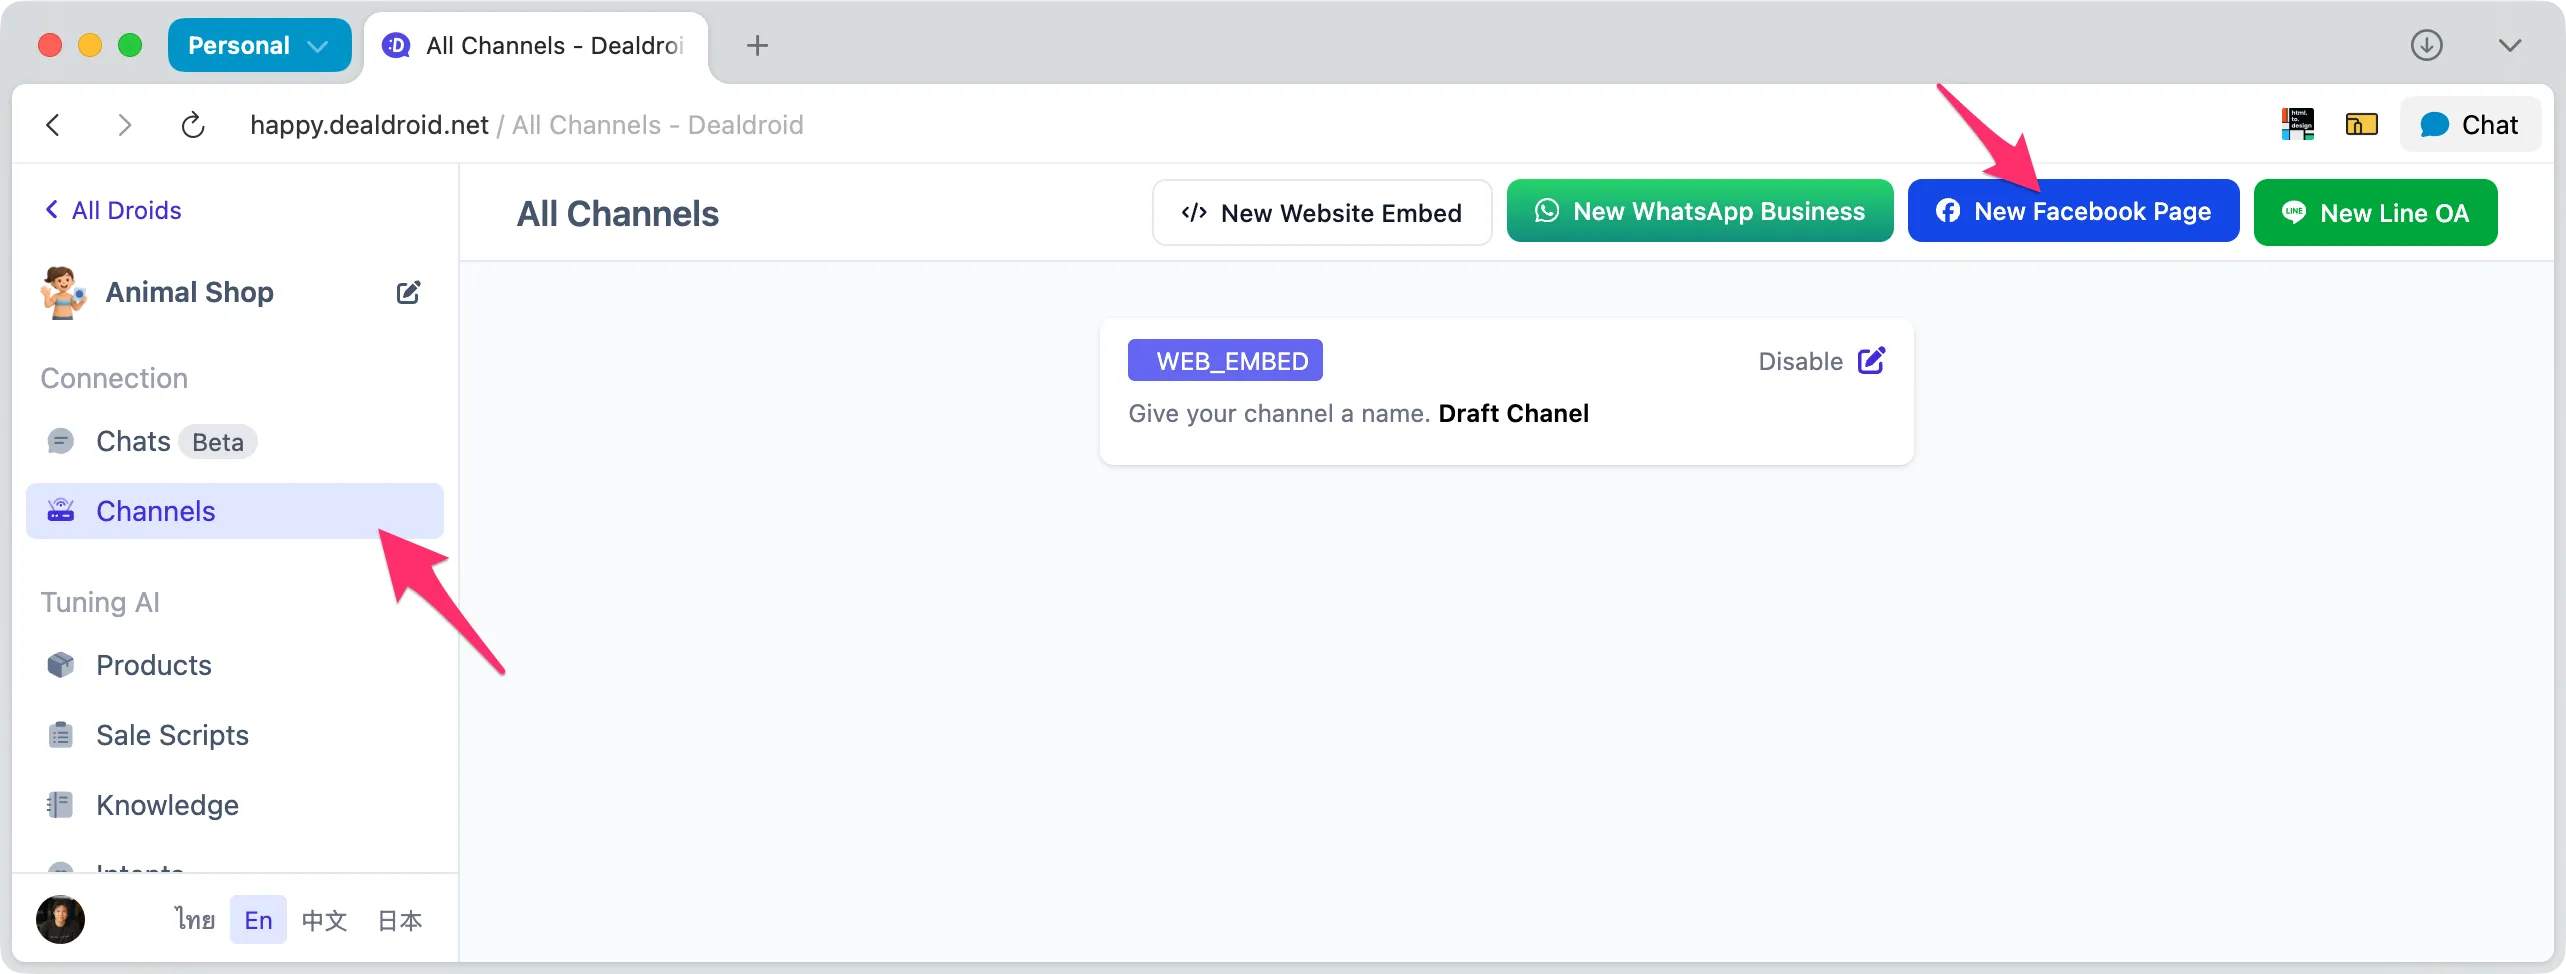
- Log in to your DealDroid dashboard
- Click on Channels in the left sidebar menu (highlighted with arrow)
- You’ll see the “All Channels” page showing any channels you’ve already connected
- Click the blue New Facebook Page button in the top right corner (highlighted with arrow)
Step 2: Connect with Facebook
Section titled “Step 2: Connect with Facebook”After clicking the New Facebook Page button:
- A popup or new window will appear asking you to log in to Facebook
- You’ll be redirected to Facebook’s authorization page
Step 3: Log In to Facebook
Section titled “Step 3: Log In to Facebook”When you click to create a Facebook Channel, you’ll be redirected to Facebook’s login page:
- Enter your Facebook credentials — Use the account that has admin access to your Facebook Page
- Click Continue or Log In
Important: Make sure you’re logging in with an account that has admin or editor permissions for the Facebook Page you want to connect.
Step 4: Grant Permissions
Section titled “Step 4: Grant Permissions”After logging in, Facebook will ask you to grant DealDroid permissions to access your Pages and send messages:
Required Permissions:
Section titled “Required Permissions:”- 📄 Manage and access Page conversations in Messenger — Allows DealDroid to read and respond to messages
- 📢 Manage your Pages — Allows DealDroid to access your Page information
- ✉️ Send messages on behalf of your Page — Allows your AI Agent to reply to customers
Review the permissions carefully, then click Continue or Allow to grant permissions.
Step 5: Select Facebook Pages to Connect
Section titled “Step 5: Select Facebook Pages to Connect”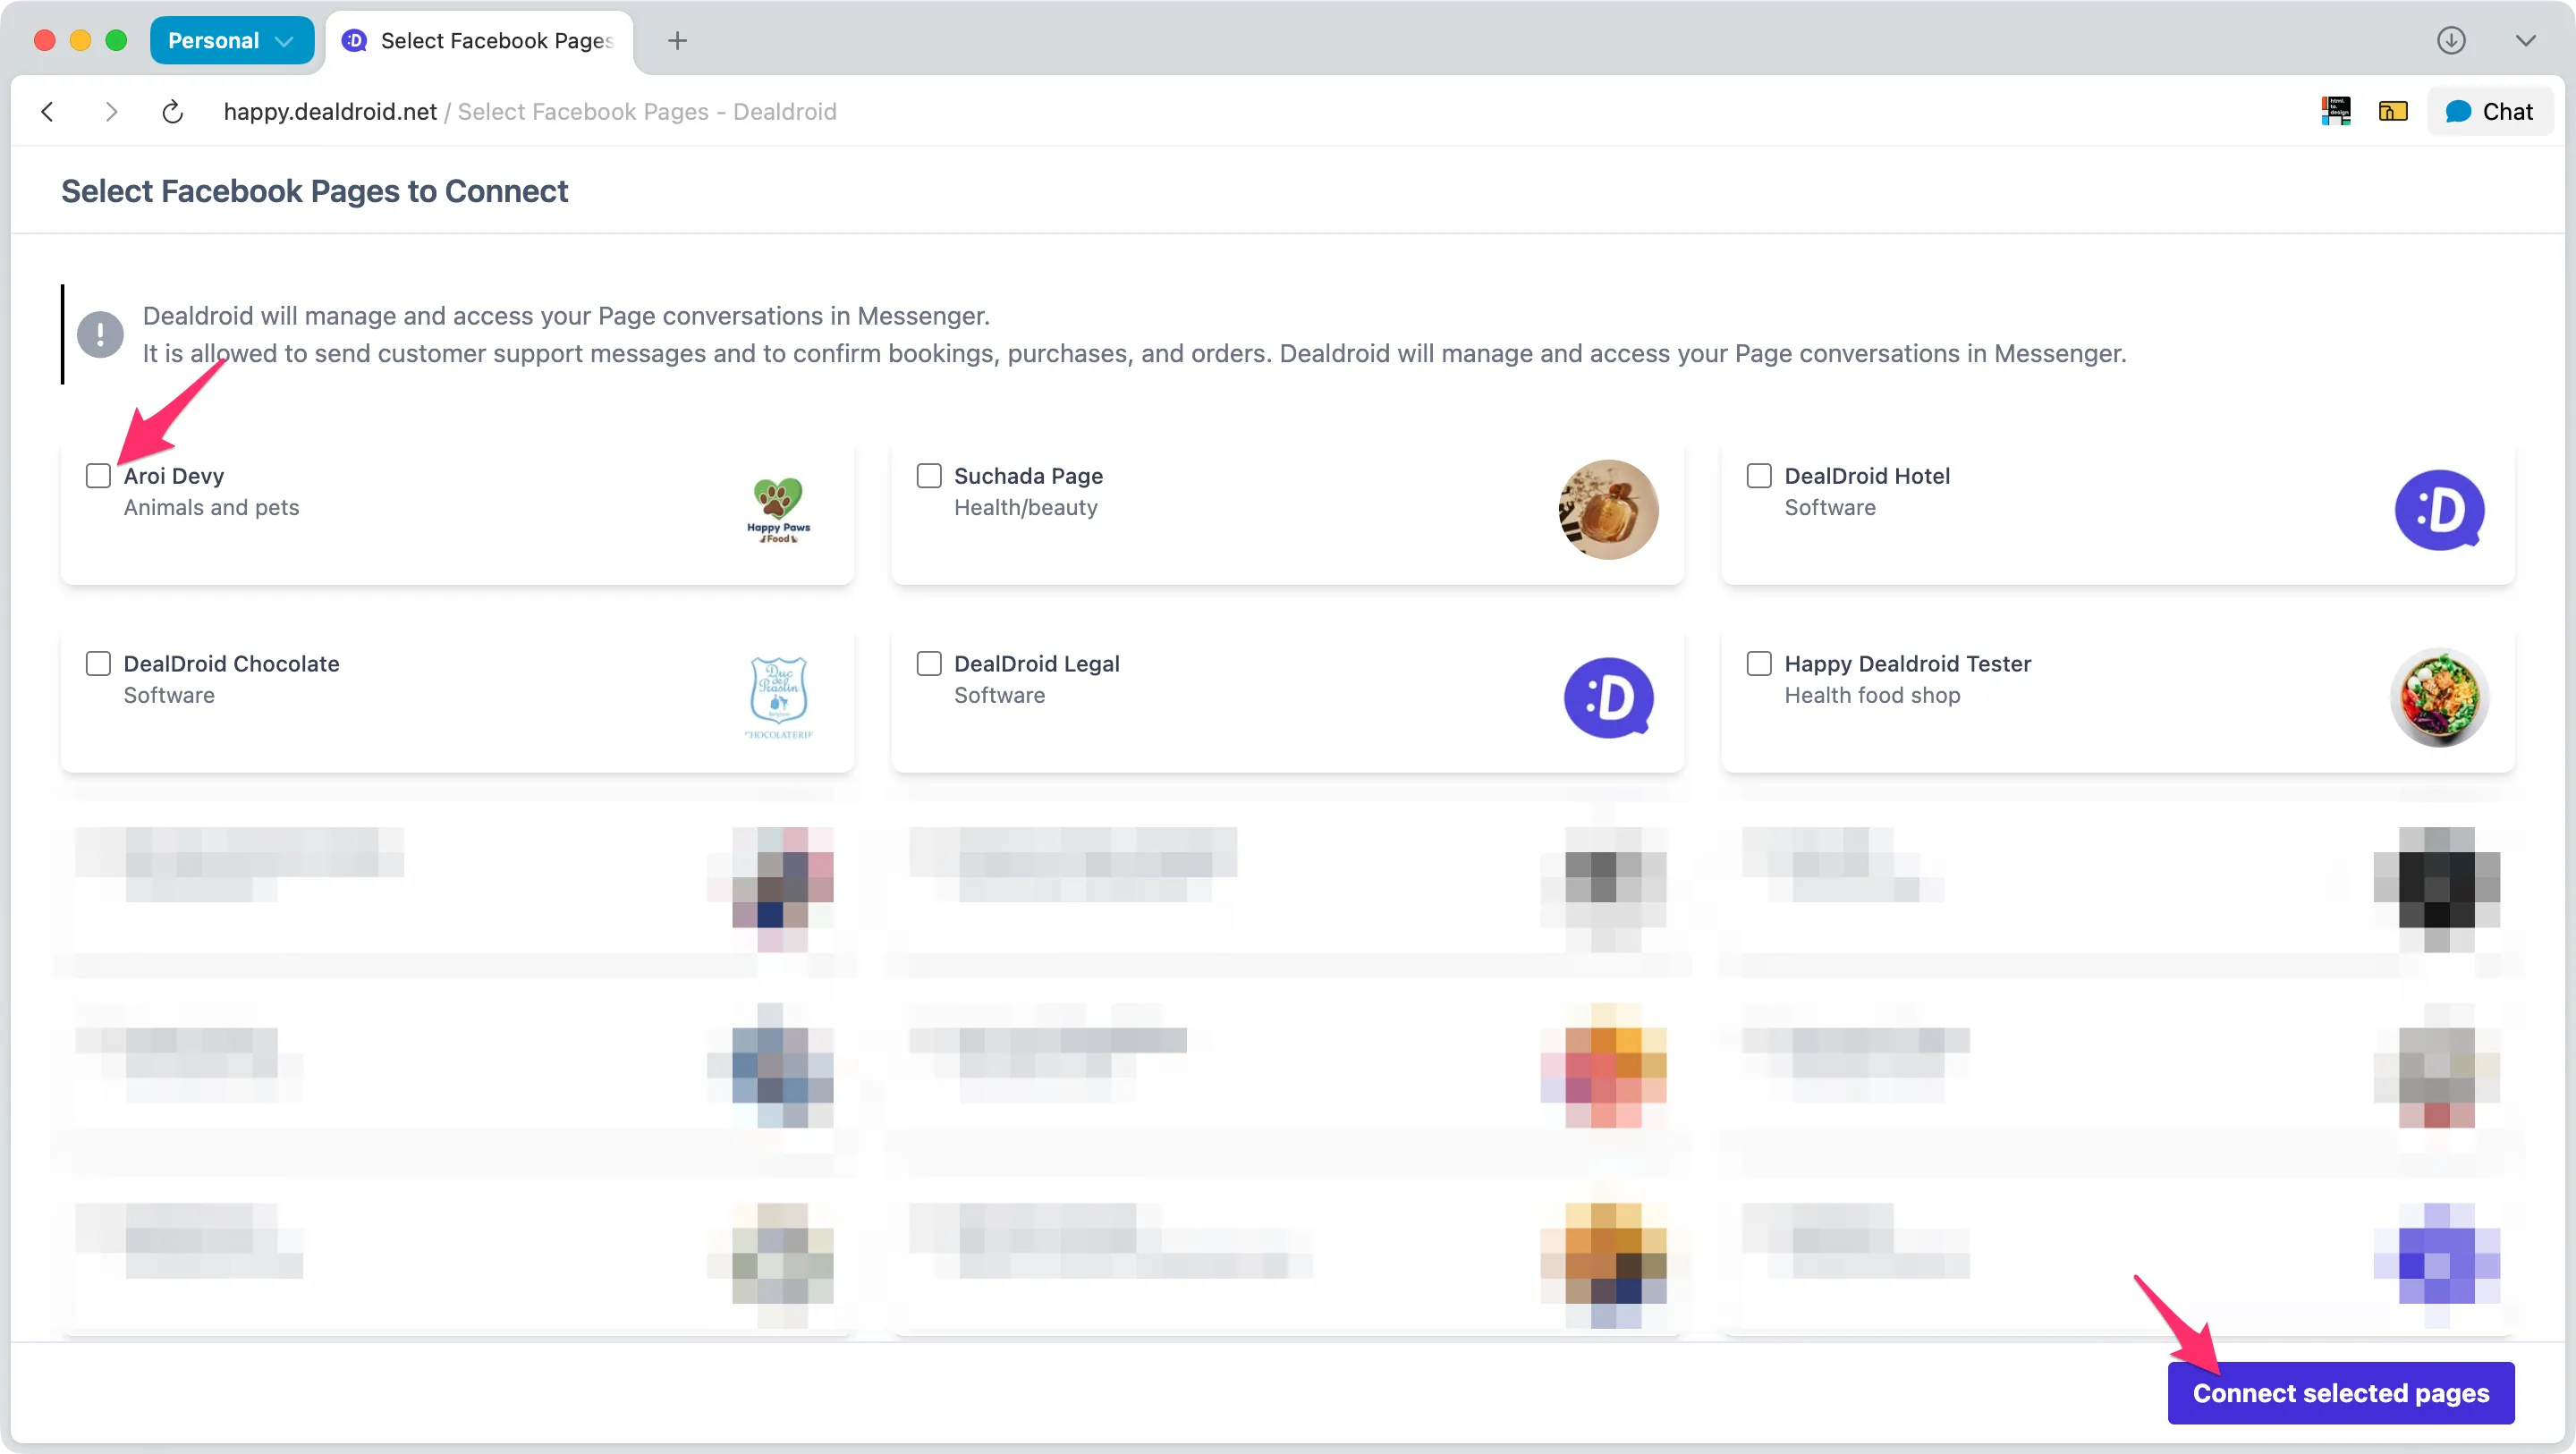
After authentication, DealDroid will retrieve all Facebook Pages you have access to — including both your personal Pages and Business Pages you manage. At this point, no connection has been made yet.
You’ll see a screen titled “Select Facebook Pages to Connect” with:
- A list of all your Facebook Pages (both personal and business accounts)
- Checkboxes next to each Page
- Each Page shows its name, category, and profile image
To connect a Page:
- Check the box next to the Facebook Page(s) you want to connect (you can select one or multiple)
- Click the purple Connect selected pages button at the bottom right
Note: You can select multiple Pages at once. Only after clicking “Connect selected pages” will DealDroid establish the connection with your chosen Pages.
Connection Complete
Section titled “Connection Complete”After clicking “Connect selected pages”, you’ll return to the DealDroid Channels page where your new Facebook channel(s) will appear automatically.
DealDroid automatically retrieves:
- ✅ Channel Name — Your Facebook Page name
- ✅ Channel Image — Your Facebook Page profile picture
- ✅ Page Information — All necessary details from Facebook
The channel is now active and ready to receive messages!
You’re All Set! 🎉
Section titled “You’re All Set! 🎉”Your AI Agent is now live on Facebook Messenger!
From this moment on, DealDroid will automatically respond to every message sent to your Facebook Page using the AI Agent you’ve configured. Your AI will handle:
- 💬 Customer inquiries — Answer questions about products, services, and policies
- 🛍️ Product recommendations — Suggest products based on customer needs
- 📦 Order tracking — Provide information about orders and shipping
- 🎯 Sales conversations — Engage customers and close sales
Testing Your Connection
Section titled “Testing Your Connection”Want to make sure everything works? Here’s how to test:
- Open your Facebook Page on your phone or computer
- Click Send Message to start a Messenger conversation
- Send a test message like “Hello” or “What products do you have?”
- Your AI Agent should respond within seconds
If you don’t get a response:
- Check that the Facebook Channel is properly connected in DealDroid
- Verify that the correct Droid is assigned to this channel
- Make sure your Droid has Knowledge Base and Products configured
- Try disconnecting and reconnecting the Facebook Page
Managing Multiple Facebook Pages
Section titled “Managing Multiple Facebook Pages”You can connect as many Facebook Pages as you need:
- One Page, one Droid — Each Facebook Page should have exactly one AI Agent assigned to it
- Multiple Pages, multiple Droids — Assign different AI Agents to different Pages (great for multiple brands or locations)
Important: Each Facebook Page should only be assigned to one Droid. Connecting the same Page to multiple Droids will cause customers to receive duplicate messages.
To add another Facebook Page:
- Go back to the Channels page
- Click New Facebook Page button again
- Follow the same steps to authenticate and select another Page
What’s Next?
Section titled “What’s Next?”Now that Facebook Messenger is connected, here’s what you can do:
- Test your AI — Send test messages to make sure responses are accurate and helpful
- Add more knowledge — Train your AI with FAQs, policies, and business information
- Upload products — Add your product catalog so your AI can recommend and sell
- Refine your sales script — Customize how your AI guides customers through the buying process
- Connect more channels — Add LINE, WhatsApp, or other messaging platforms
Troubleshooting
Section titled “Troubleshooting”Can’t find my Facebook Page during setup
Section titled “Can’t find my Facebook Page during setup”- ✅ Make sure you have admin or editor access to the Page
- ✅ Log in with the correct Facebook account that manages the Page
- ✅ If the Page doesn’t appear, check your Facebook Page roles and permissions
Want to disconnect a Facebook Page
Section titled “Want to disconnect a Facebook Page”If you still want to proceed:
- Go to Channels in DealDroid
- Find the Facebook Channel you want to remove
- Click Delete or Disconnect
- Review the warning message
- Confirm the action
You can also revoke DealDroid’s permissions directly from your Facebook Page settings under Settings > Business Integrations.
Tip: If you only need to reassign the channel to a different Droid, you don’t need to disconnect. Simply change the Droid assignment in the channel settings instead.
Need Help?
Section titled “Need Help?”If you encounter any issues during setup or have questions about the Facebook integration, our support team is here to help. Reach out anytime!
Your AI sales agent is ready to engage with customers on Facebook Messenger. Let’s start converting those conversations into sales! 😊