Manage Organization
As your business grows, you may need extra hands to help manage your Droid. Whether it’s updating products, adding knowledge, or monitoring conversations — teams make the dream work!
Good news! You don’t have to do it alone. Organizations let you create groups of users who can access the same Droids. You can add multiple organizations to a single Droid, making it easy to divide responsibilities across your team.
For example, you might create:
- One organization for customer support — handling daily chats
- Another organization for content management — keeping products and knowledge up-to-date
- Another for admins — overseeing everything
The possibilities are endless!
How Organizations Work
Section titled “How Organizations Work”Before we dive in, here’s what you need to know:
- 🏢 Organizations are groups of users — Team members belong to an organization, not individual Droids
- 🔑 Droid owners control access — Only you can decide which organizations can access your Droids
- 👑 You’re never locked out — Even if another admin removes you from an organization, you always keep access to Droids you own
- 💼 Only owners can manage subscriptions — Organization members can’t change your billing or subscription plans
Step 1: Access Organization Settings
Section titled “Step 1: Access Organization Settings”Start by navigating to the team and organization management area.
- Go to Settings from your Droid dashboard
- Locate Team & Organization under the Account section
- Click on Manage Organization and team member
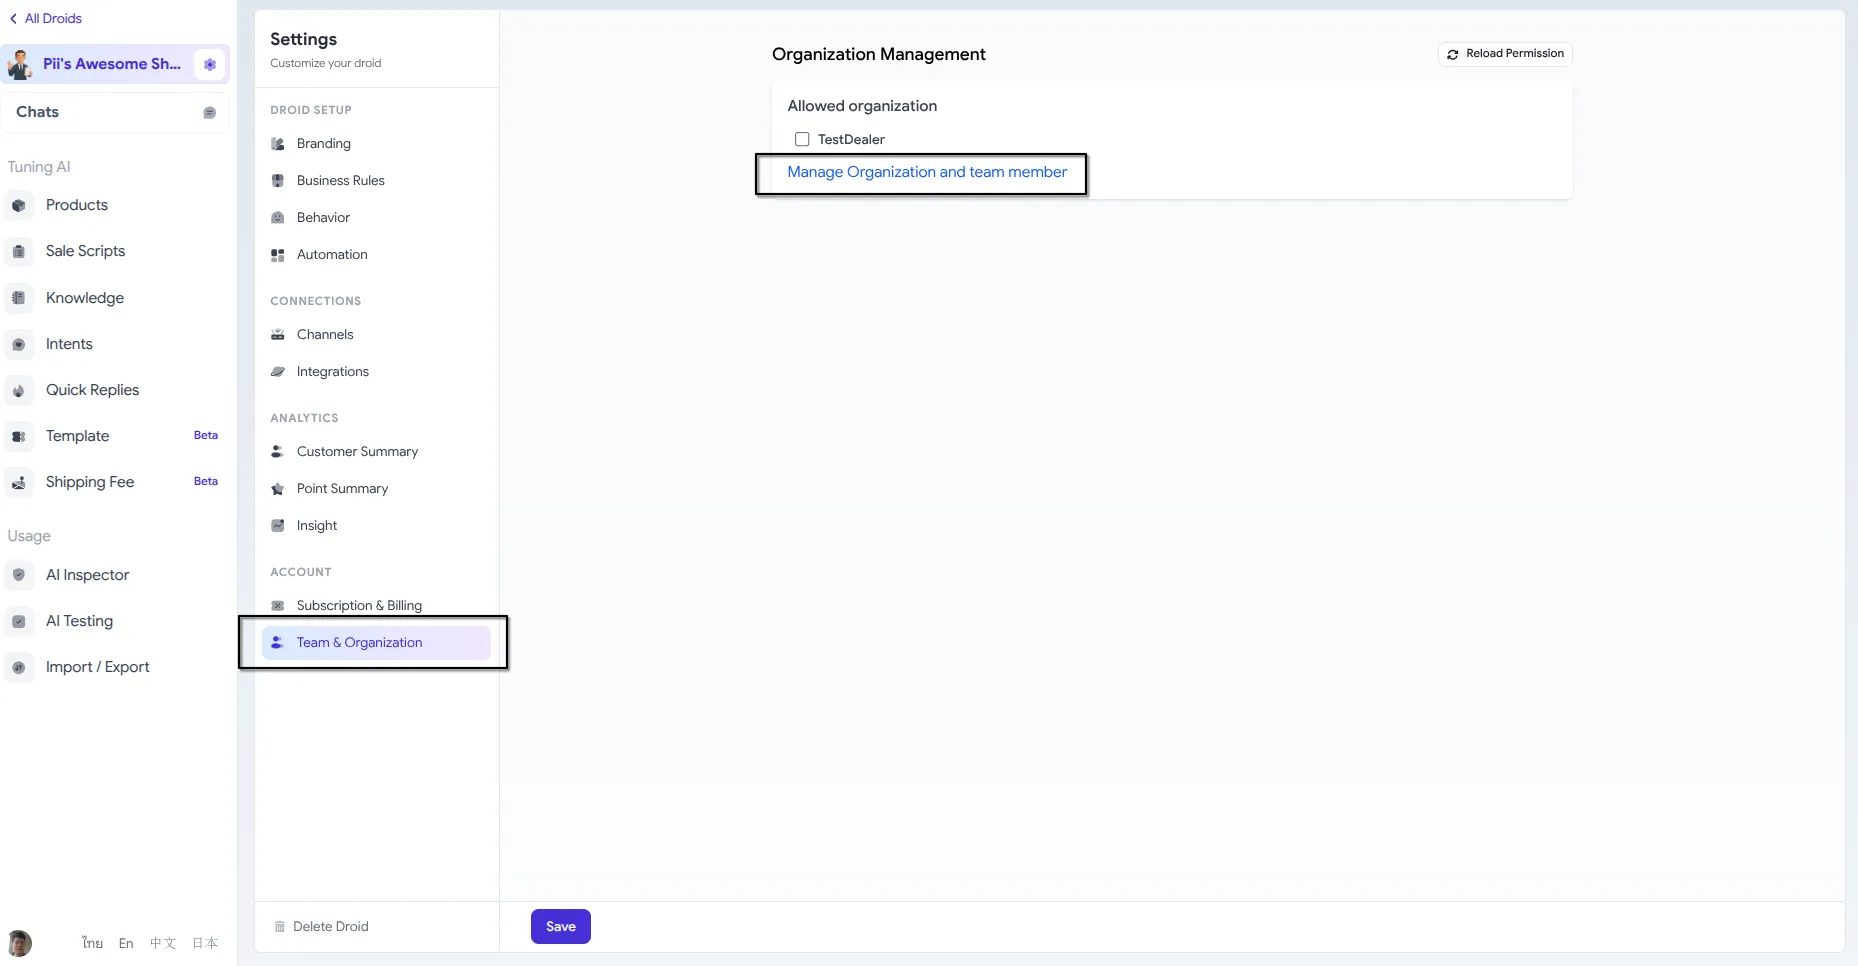
You’ll be redirected to the Organization portal where you can create and manage your organizations.
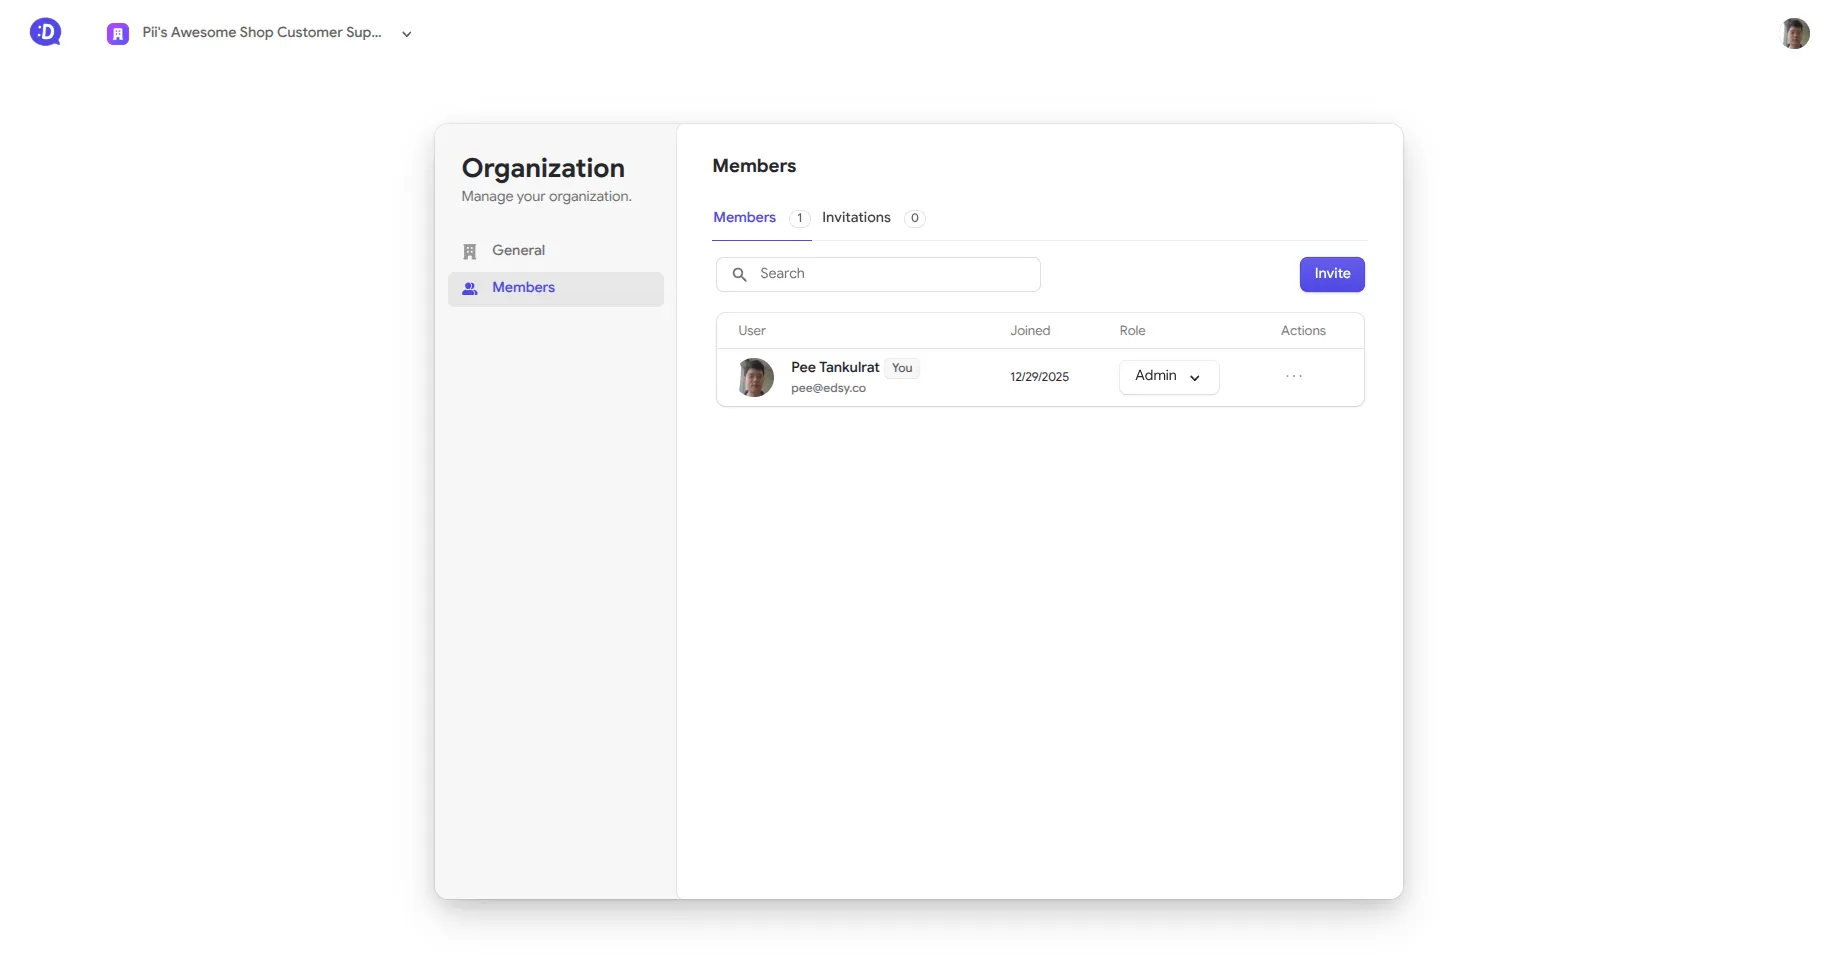
Step 2: Explore the Organization Portal
Section titled “Step 2: Explore the Organization Portal”Welcome to your Organization hub! This is where all the magic happens.
The portal lets you:
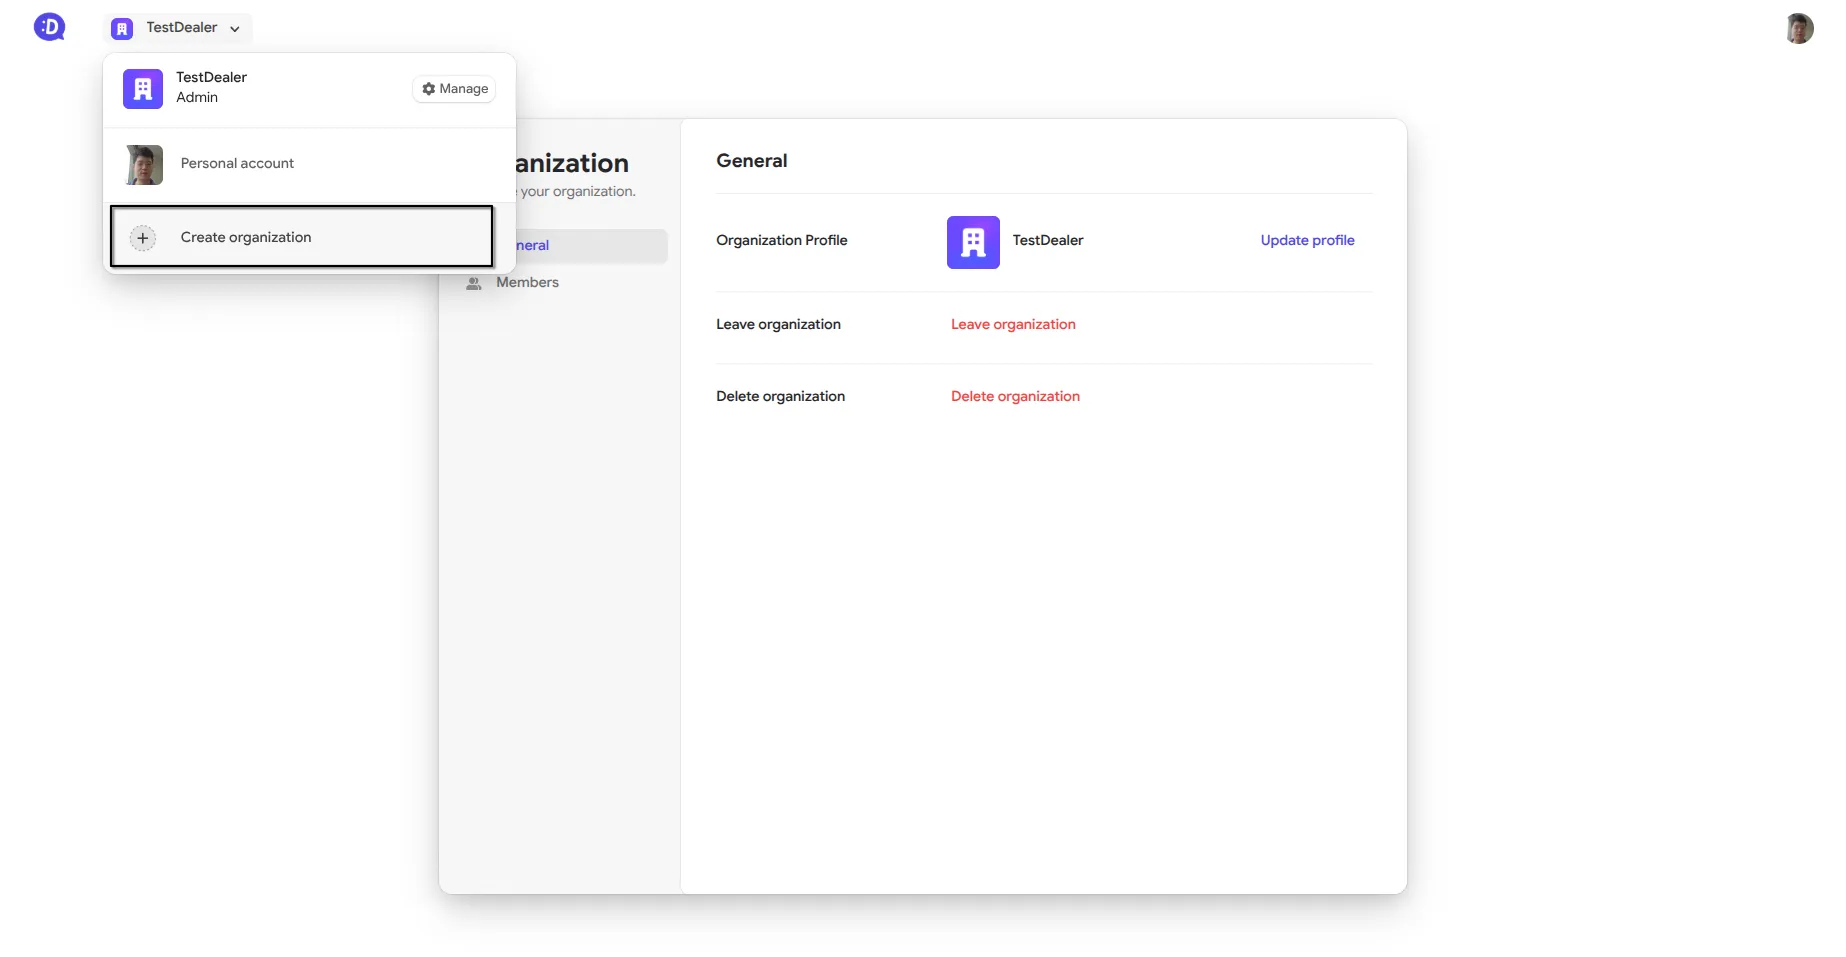
- ➕ Create new organizations — Set up new teams for different purposes
- 👥 Manage members — Invite users and assign roles
- 🔄 Switch between organizations — Use the top navigation bar to jump between organizations you’re a member of
- ✏️ Edit organization details — Update names and settings
Step 3: Create a New Organization
Section titled “Step 3: Create a New Organization”Ready to build your team? Click Create new Organization to get started.
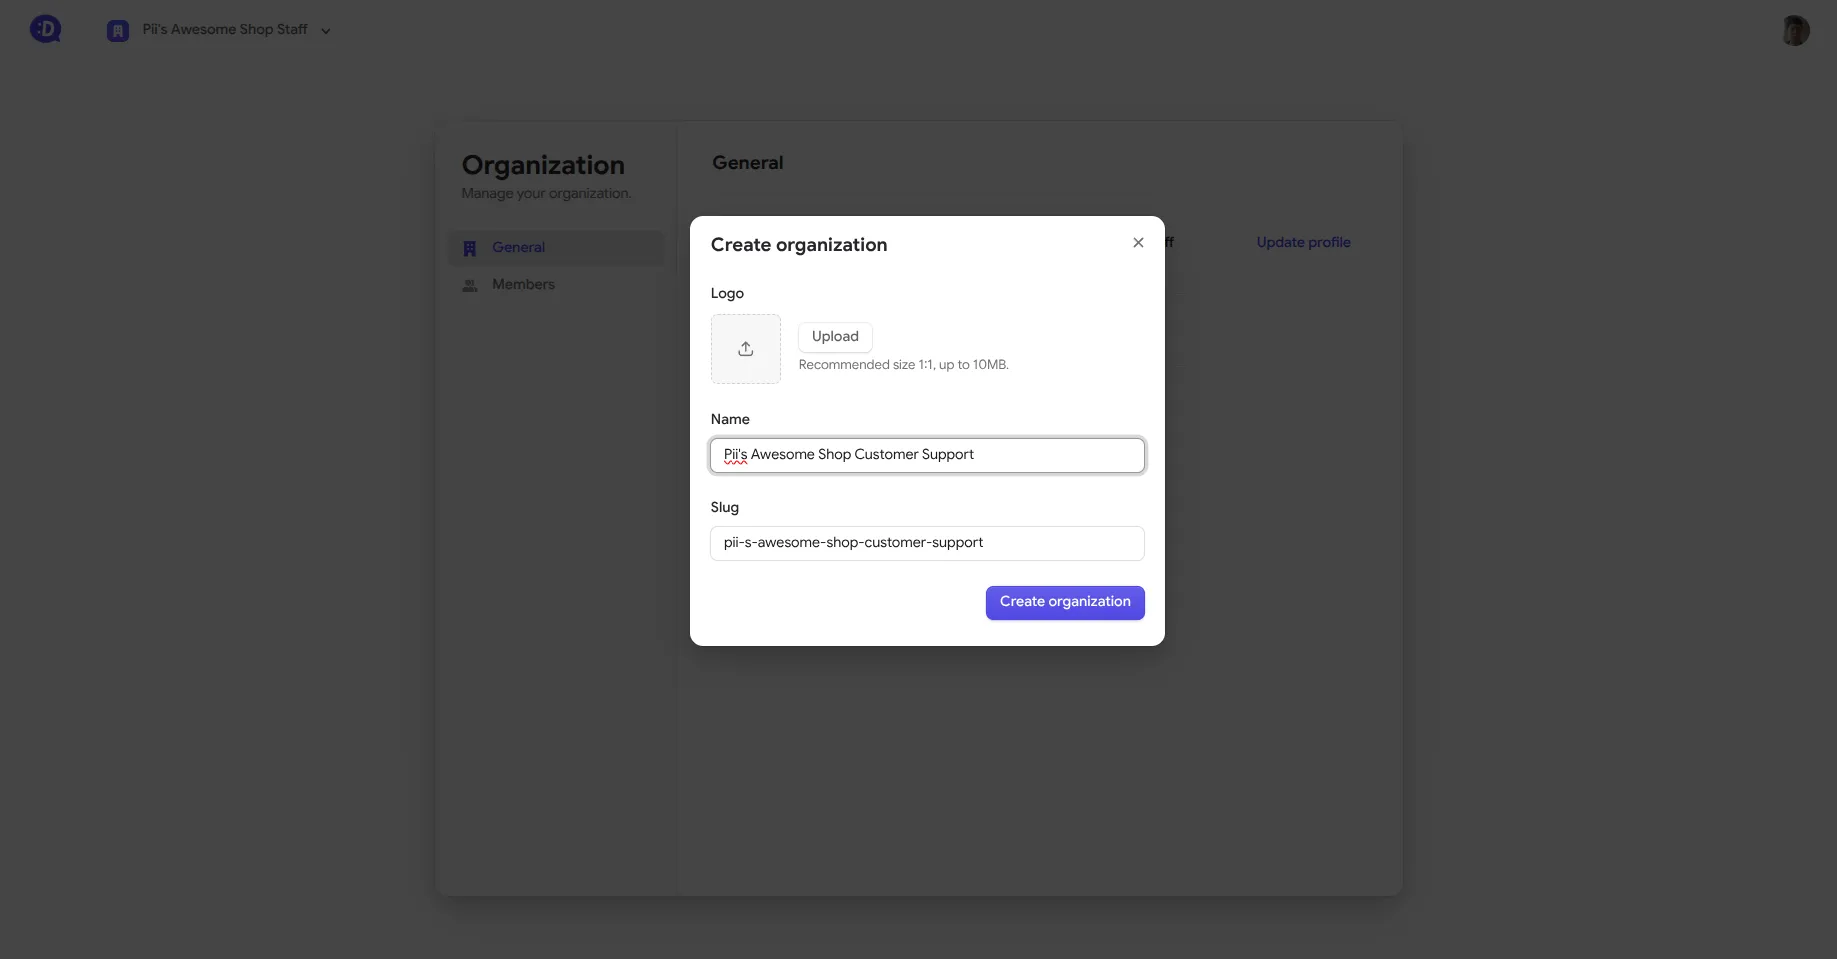
You’ll be asked to provide a globally unique name for your organization. This is how your organization will be identified across DealDroid, so choose something clear and memorable.
Tips for choosing a name:
- Make it descriptive — “Acme Support Team” is better than “Team 1”
- Think long-term — Will this name still make sense as your team grows?
- Add a logo to the Organization to help you quickly identify what this Organization is for.
Once you’ve picked the perfect name, click Create and your organization is live!
Step 4: Invite Team Members
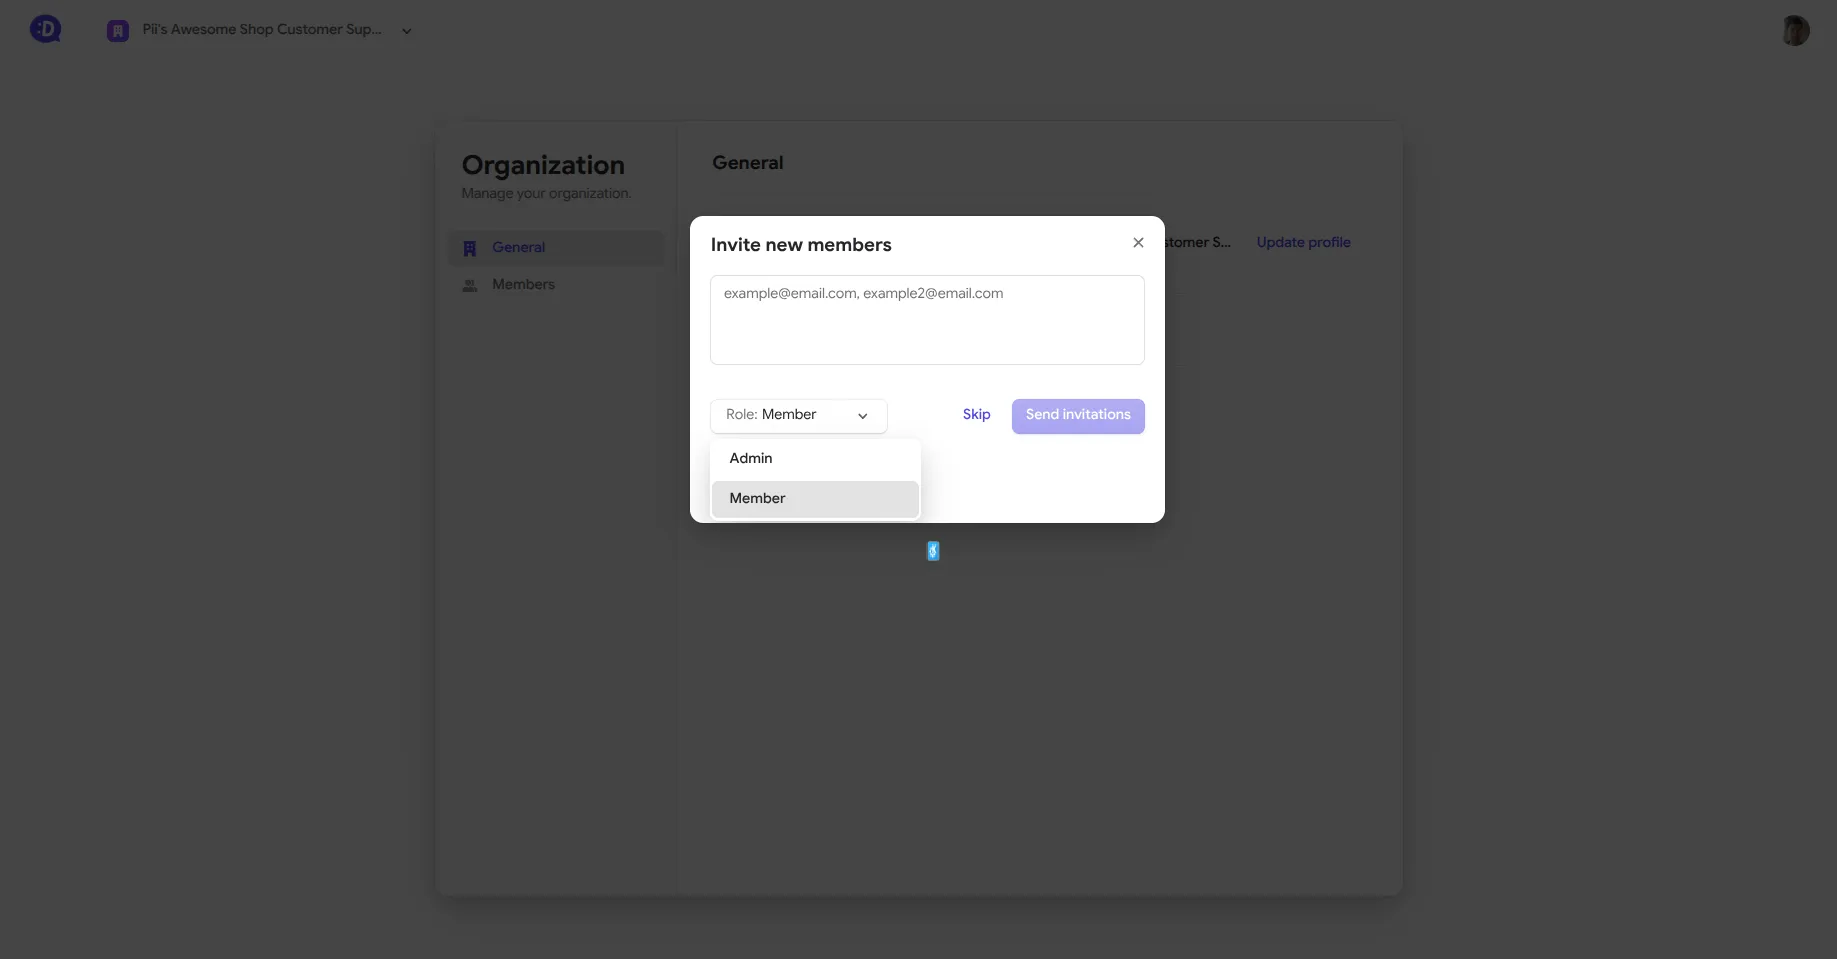
Section titled “Step 4: Invite Team Members”Now that your organization exists, it’s time to add people. After creating an organization, you’ll be prompted to invite members via their email address.
Understanding Member Roles
Section titled “Understanding Member Roles”There are two levels of membership to choose from:
Admin — The organization leader
- ➕ Add or remove members
- ✏️ Change member roles
- 🎯 Manage organization settings
Member — The team contributor
- Access all Droids shared with the organization
- Edit products, knowledge, and settings
- Cannot manage other members
Choose wisely! Admins have full control over the organization. Don’t worry — even if another admin removes you, you’ll always keep access to the Droids you own personally.
You can also skip this step and invite members later through the Members tab in the Organization Portal.
Step 5: Grant Organization Access to Your Droid
Section titled “Step 5: Grant Organization Access to Your Droid”Now that your organization is set up and populated, it’s time to give your team access to your Droid.
Navigate back to your Droid’s Settings page. You should now see the organizations you’re a member of listed under the Organization section.
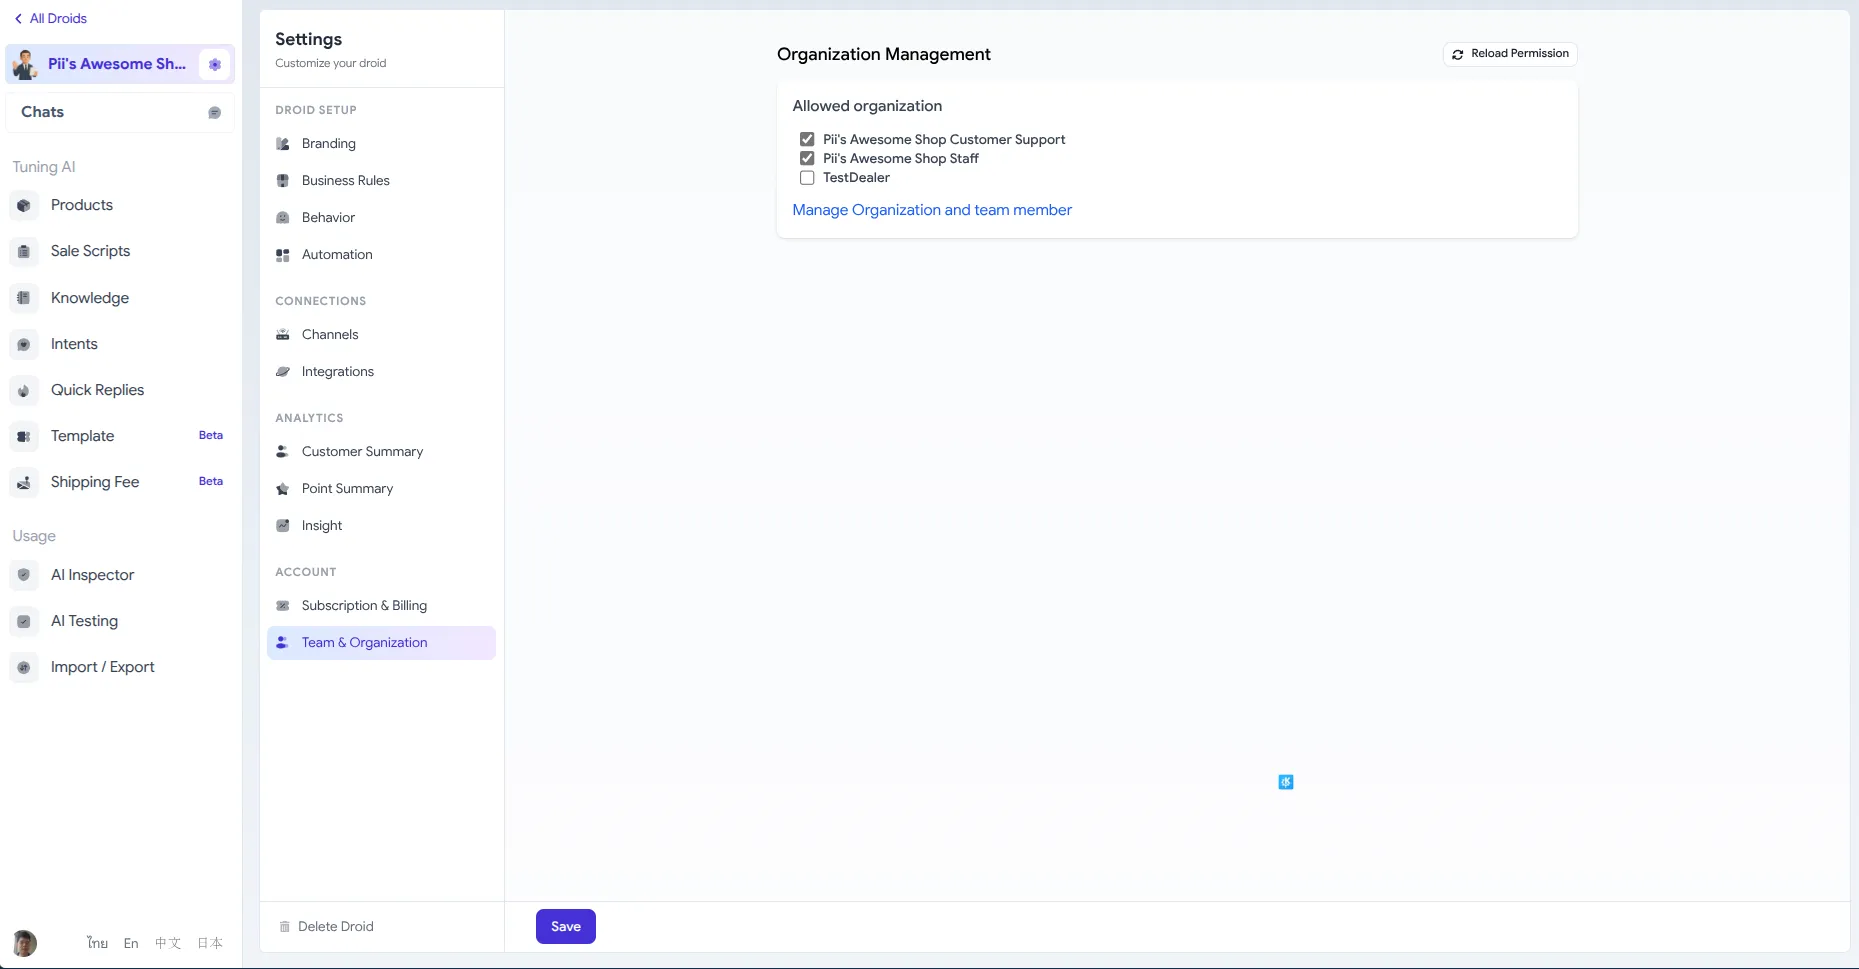
To grant access:
- Check the boxes next to the organizations you want to share with
- Click Save to confirm
That’s it! Members of those organizations can now access and manage your Droid.
Remember: Only the Droid owner can add or remove organization access. If you don’t see your new organization listed, try clicking reload to refresh the list.
Managing Organization Access Over Time
Section titled “Managing Organization Access Over Time”As your team evolves, you may need to adjust access:
- Add more organizations — Simply check additional boxes and save
- Remove access — Uncheck the box and save to revoke access
- Change member roles — Use the Members tab in the Organization Portal
- Leave an organization — Navigate to the Organization Portal and manage your memberships
Best Practices
Section titled “Best Practices”Keep Your Organized
Section titled “Keep Your Organized”- 🏢 Create organizations by function (Support, Content, Admin) rather than by individual Droid
- 👥 Use descriptive names that make it clear who belongs where
- 📝 Document your organization structure for onboarding new team members
Security First
Section titled “Security First”- 🔐 Only grant access to team members who truly need it
- 👑 Limit Admin roles to trusted individuals
- 🔄 Regularly review and remove access for former team members
Communication is Key
Section titled “Communication is Key”- 💬 Let your team know when you grant them access to new Droids
- 📧 Send welcome emails to new organization members with instructions
- 🎓 Consider creating internal documentation for your team on how to use DealDroid
That’s It! 🎉
Section titled “That’s It! 🎉”Your team is now ready to collaborate!
By setting up organizations, you’ve transformed DealDroid from a solo tool into a team platform. Your AI sales agents can now benefit from multiple perspectives and skill sets — making them even more powerful.
As always, we’re here to help if you have any questions. Happy collaborating! 😊